The spider plant (Chlorophytum comosum) is one of the easiest and most rewarding houseplants to propagate. With its elegant arching leaves and baby “spiderettes,” this plant not only adds life to your indoor space but also gives you the gift of multiplying it, almost effortlessly. If you’re a beginner gardener or simply want a low-mess way to grow more plants, water propagation is a perfect method to try.
In this article, we’ll walk you through everything you need to know about propagating spider plants in water, from choosing the right spiderette to ensuring root growth and successful planting.
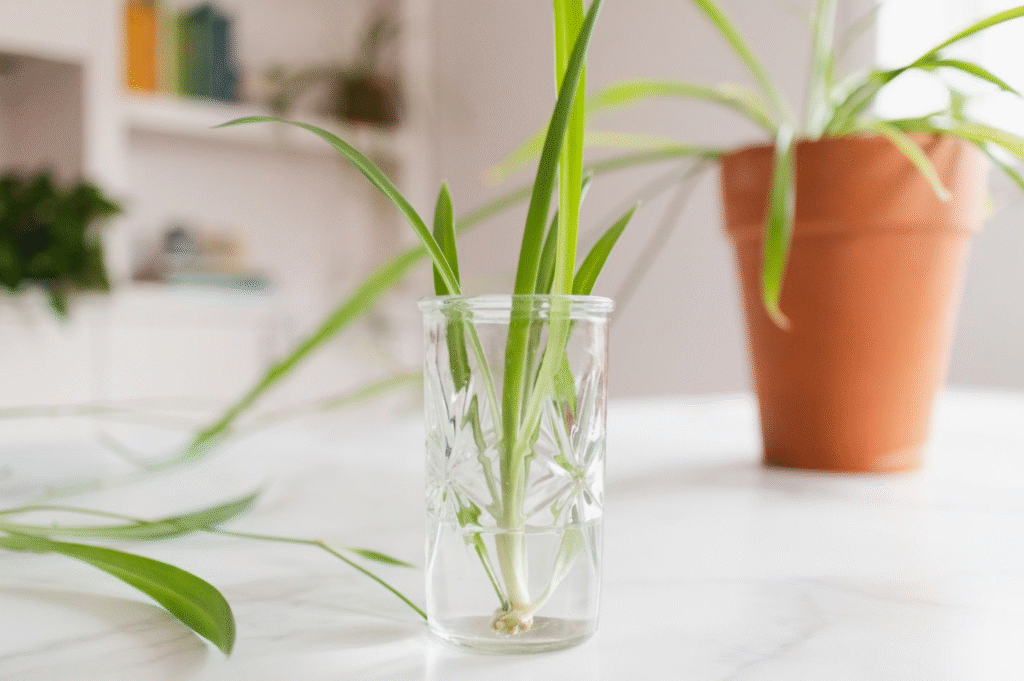
Why Propagate Spider Plant in Water?
Water propagation is popular for many reasons:
- Beginner-friendly: No soil needed, less mess, and easy to monitor root growth.
- Cost-effective: Turn one plant into many without buying more.
- Fun and educational: Great for teaching kids about plant life cycles.
- Visually pleasing: Watch roots grow in a clear glass jar—it looks beautiful on a windowsill!
What You’ll Need
Before you start, gather these simple supplies:
- A healthy spider plant with baby offshoots (spiderettes)
- Sharp scissors or pruning shears
- Clean glass jar or cup
- Filtered or dechlorinated water
- Bright, indirect sunlight
Optional: Rooting hormone (not necessary, but may speed up growth)
Step-by-Step Guide to Propagate Spider Plant in Water
1. Identify a Healthy Spiderette
Look for small spiderettes (also called “plantlets” or “babies”) growing from the mother plant. A good candidate for propagation will:
- Have several small leaves
- Show tiny nubs or visible roots at the base
- Be at least 2–3 inches long
Tip: Avoid very tiny or underdeveloped spiderettes, as they may not survive the transition.
2. Cut the Spiderette
Using clean, sharp scissors or pruning shears, carefully snip the spiderette from the long stem (called a stolon). Cut close to the base of the plantlet but avoid damaging the mother plant.
Pro Tip: If you want, you can leave the spiderette attached to the mother plant and place it in water while still connected. Once it develops roots, then you can detach it.
3. Place the Spiderette in Water
Fill a glass jar or cup with filtered water. Tap water can work too, but let it sit for 24 hours to allow chlorine to evaporate.
- Place the cut end of the spiderette into the water, making sure only the base is submerged.
- Keep the leaves above water to prevent rot.
- Place the jar in a warm, well-lit area with indirect sunlight.
4. Wait for Roots to Grow
Now comes the exciting part, waiting for roots to form!
- You’ll typically see roots begin to appear within 7–10 days.
- Let the roots grow to about 1–2 inches long before transplanting.
Change the water every 3–4 days to keep it clean and oxygenated. Dirty water can cause rot or mold.
5. Transfer to Soil (Optional)
Once your spiderette has a healthy root system, you can plant it in soil or keep it growing in water.
To transplant:
- Use a small pot with well-draining potting mix.
- Water the soil gently after planting.
- Place in indirect sunlight and care for it like a mature spider plant.
If you prefer hydroponics, spider plants can survive in water indefinitely but they do best in soil over time.
Common Mistakes to Avoid
Here are a few things to watch out for:
| Mistake | Why It’s a Problem | Fix |
| Submerging the leaves | Can lead to rot | Keep only roots or base in water |
| Using dirty water | Promotes bacterial growth | Change water regularly |
| Direct sunlight | Can burn leaves | Use indirect sunlight instead |
| Overcrowding jars | Slows down root growth | Use one spiderette per jar |
How Long Does It Take?
On average:
- Roots appear in 7–10 days
- Ready for planting in 2–3 weeks
- Visible new growth in 3–4 weeks after planting in soil
With patience and proper care, your baby spider plant will thrive just like its parent.
Benefits of Water Propagation for Spider Plant
Aside from being simple and mess-free, water propagation offers additional benefits:
- Clear view of root health: You’ll know exactly when it’s time to transplant.
- Lower risk of root rot compared to overwatering in soil.
- No special tools needed: A glass and some water are all you need.
Frequently Asked Questions
Can spider plants live in water forever?
Yes, but they grow slower and may lack nutrients. Add liquid fertilizer every few weeks if you want to keep them in water long-term.
When is the best time to propagate?
Spring or early summer is ideal when the plant is actively growing.
Do I need to use rooting hormone?
Not necessary. Spider plants root very easily in water without any help.
Final Thoughts
Propagating your spider plant in water is an easy, affordable, and satisfying way to expand your indoor garden. Whether you want to gift a plant to a friend, decorate more corners of your home, or simply enjoy watching roots form, this method is nearly foolproof.
With just a bit of attention and care, your spiderette will soon become a thriving plant of its own. And as it matures, providing the right light, water, and feeding routine becomes essential. You can learn all about nurturing a healthy plant in our detailed guide on growing spider plants successfully.